Text-to-Image

The Text-To-Image functionality can replace certain texts with the images you have defined for these specific texts. You can do this manually as well off course, but there are a few reasons to automate this process:
1. Avoid human errors - Automation secures the right image is placed in the right place
2. Precision - Automation takes care of the exact positioning and can even take care of resizing the image if necessary
3. Save Time - After defining which texts you want to be replaced with which images, you can use the same definitions for other tables and charts. You can even reuse the definitions in other presentations by importing the definitions.
Creating the Text-To-Image definitions
Before we can automatically display images in your tables and charts based on text, you'll need to define the associations. Please watch this video showing you how to do this:
Here a description of the process as you can see in the video:
Please click 'Text-To-Image' in the ribbon tab. A form will appear, allowing you to specify which images should be displayed when specific texts from your workbook are populated:
Creating a Text-To-Image definition
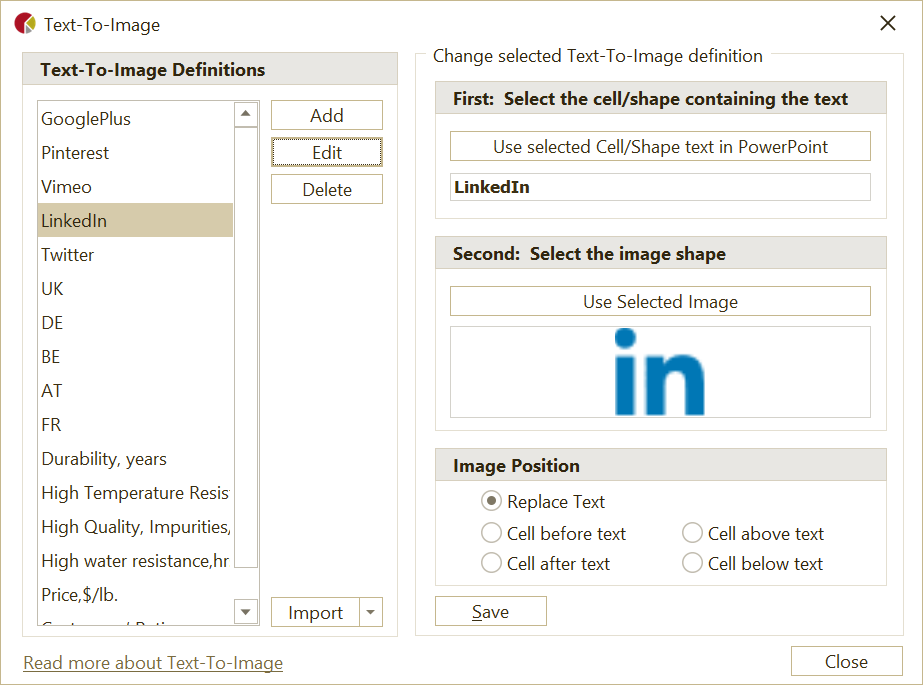
To define which image should appear instead of a specific text, please follow these simple steps:
- Select a Table Cell or a Shape in PowerPoint: Choose a cell or shape in your presentation that has the text you want to use as a trigger for the image.
- Define the Text: Click on 'Use selected Cell/Shape text' to specify the text that should trigger the image.
- Choose Your Image Shape: Select the 'image' shape you want to use as the image. This can be any PowerPoint shape, so you have the flexibility to create your own or import a image.
- Define the Image: Click 'Use Selected Image' to confirm your choice and define the image.
- Set the Image's Position: Do you want the image to replace the text? It is also possible to display the image in the cell to the left or to the right of the cell containing the text, or in the cell above or below the cell containing the text. Make sure you have designed your table in such a way so you have made place for adding the image.
Note: The chosen image shape will be copied to slide 1 and will be hidden. Do NOT delete this hidden shape!
Importing Text-To-Image definitions
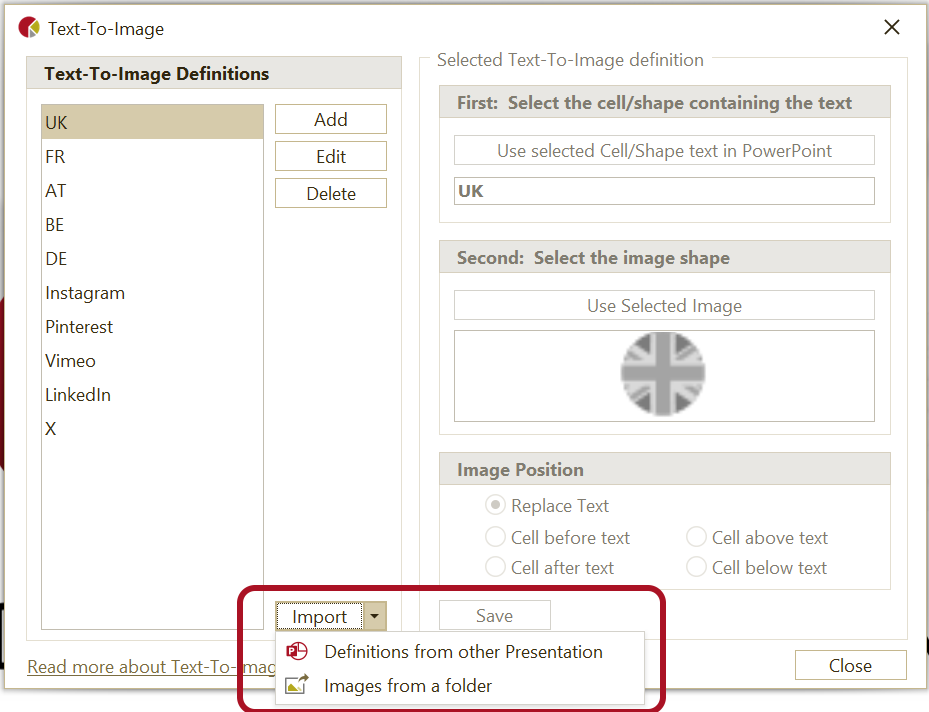
By clicking 'Import -> Definitions from other presentation' you can import all the definitions including the image-shapes from another presentation.
By clicking 'Import -> Images from a folder', a definition for each chosen image will be created. The file name will be used as the text which should be replaced by the image. You can edit this text in case it is not correct by chosing the definition in the list and then click 'Edit'.
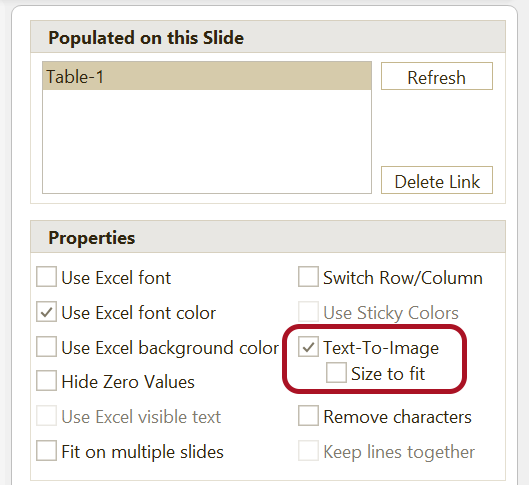
Applying Text-To-Image definitions
Once you've created Text-To-Image definitions, please select the table or chart for which you want to show icons. In the 'Populated Pane' in the right side of PowerPoint, check 'Text-To-Image' in the pane. Your table or chart will now display the defined icons based on the background or font colors in your linked workbook cells: